To make a long story short: Holy crap, this camera is awesome!
Now, the slightly longer story... I'm not going to repeat the specs or show you pics of the camera itself since there a gazillion other places where you can find that kind of information. Where I think I can provide value is in my own perspectives based on shooting with this camera for the better part of a month.
And yes, I've been doing a *lot* of shooting. I'm enrolled in a 10-month Professional Photography certificate program at my local college, and as such, I've been shooting almost every day for the past three months. I've already shot about 5500 frames on the E-M1 since I've gotten it. Mind you, not all of those are "quality" shots since I've made extensive use of the high-speed burst and bracketing capabilities, but still, that's as many shots as I took in all of 2012, so I think that says something. My basis for comparison is my previous main body, the Olympus OM-D E-M5, as well as older Micro Four Thirds cameras by Panasonic. Please check out my earlier posts on the E-M5 for more information on how I use my camera, and tactics that I employ to deal with some of its shortcomings.
Without any further ado, here are my quick thoughts on this amazing new camera:
- I didn't think it would be possible, but autofocus really *is* faster and more reliable than the E-M5, at least the way I use it. Unfortunately I haven't really put its continuous tracking capabilities to the test, but at least using it the way that I used the E-M5, I have a far higher hit rate for in-focus shots. I attribute this to the slightly faster subject acquisition, but probably more important - at least the way I use it - is that the AF zones can be made far smaller than on the older body. What this means is that you can put the AF point exactly where you want it, and thus reduce the risk of the camera focusing on the background.
- In the theme of better focusing: focus peaking definitely helps speed up the process of manual focusing when you want fine, fine control over your focus point.
- External controls! Woo-hoo! One of my major frustrations on the E-M5 was a lack of external controls for drive mode (in-camera HDR, exposure bracketing, high-speed burst, low speed burst, and self-timer). I use this function *all the time* and now it is possible to quickly change modes with a press of a button and a spin of a dial. Something else that I have found very handy is the toggle switch that allows you to access four different setting with only two dials. For example, I can very quickly change shutter speed and aperture or white balance and ISO just by hitting the mode switch and the two main control dials.
- The intervalometer rules. It was a happy day when I discovered this function on the camera. Using it, I can set the camera to take as many frames as I want at pre-determined intervals. I took several self-portraits ("selfies?") as part of my school assignments, and the E-M1's capability to capture several frames without my intervention or an assistant is what made some of my finished photos even possible. I just wish that I could get sub-second intervals, but that's a minor point.
- With the larger grip, the E-M1 is a much better platform than its smaller, older brother for shooting with larger lenses. Not that the Micro Four Thirds lenses get very big in the first place, but one of my mainstay lenses - the Panasonic 100-300 F4.0 - was sometimes a bit much to manage on the nearly-grip-less E-M5. Even with the added bulk, the E-M1 weighs less and is substantially more portable for activity-driven shooting situations than any comparable DSLR.
- The WiFi is actually useful! I had never intended to use the WiFi function on this camera, but like the intervalometer, it was indispensable for self-portrait type shots. I could use my Android tablet to frame myself, set the focus, and take the shot. It was also handy in studio type shots when I didn't have an assistant: I could arrange my still life and see the results in real time without having to return to the camera's viewfinder. Having said that, I do wish that you could play with more than the basic settings when controlling the camera in this way, and that the live image was in high resolution so that you can see the fine detail of your compositions. As far as my research has shown, a true tethered shooting option does not exist for these otherwise highly-capable cameras.
Other than the fore-mentioned tethered shooting limitations, the other major annoyance is that the accessory port cover is small, fiddly, and *will* get lost. I lost mine within a week of getting the camera, thus compromising its weatherproofing. Again, this is important for how I use the camera, and may or may not be important for other people.
In a nutshell, with the E-M1 Olympus kept everything that was already great about the E-M5 and filled most of the holes that kept it from being my ultimate camera.
In a nutshell, with the E-M1 Olympus kept everything that was already great about the E-M5 and filled most of the holes that kept it from being my ultimate camera.
Here are some of the images that came from this very capable little beast, each of which highlights some of its cool features:
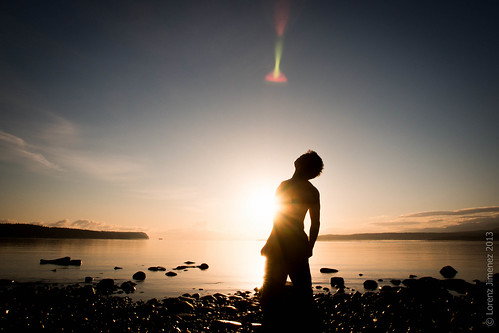 |
| Awakening |
The above photo is a self-portrait. Using the intervalometer, I was able to move around in front of the camera to try different things while it automagically took several frames without my intervention.
This photo used the in-camera double-exposure function. Yes, I guess the function itself is a bit gimmicky and the same effect could likely be achieved in post-processing, but I like how it replicates how you would do double exposures in old film cameras.
 |
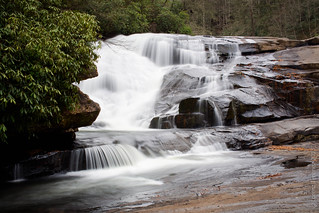
| A walk in the woods |
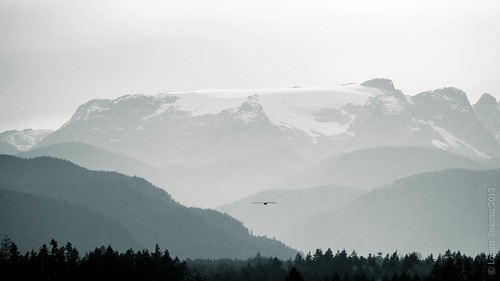 |
| Freedom |
I plan to use the E-M1 as my main camera body. The E-M5 still has a place in my camera bag though: it's slightly more pocketable, and when I bring both bodies along, I plan to put the longer, heavier lenses on the E-M1, and wider lenses on the E-M5, where focus accuracy is potentially not as critical.
Now, I'm just looking forward to trying the new Olympus Pro series F2.8 12-40mm lens. Anyone looking to get me a Christmas present? :)